Services
A service represents an experience you provide to your customers. If you provide multiple different experiences, such as one hour and whole day kayaking tours, those should be different services. Managing services is essential for offering and organizing the various experiences your business provides. Here’s a detailed guide on how to add, edit, and manage services using the Flokk platform.
Adding a new service
-
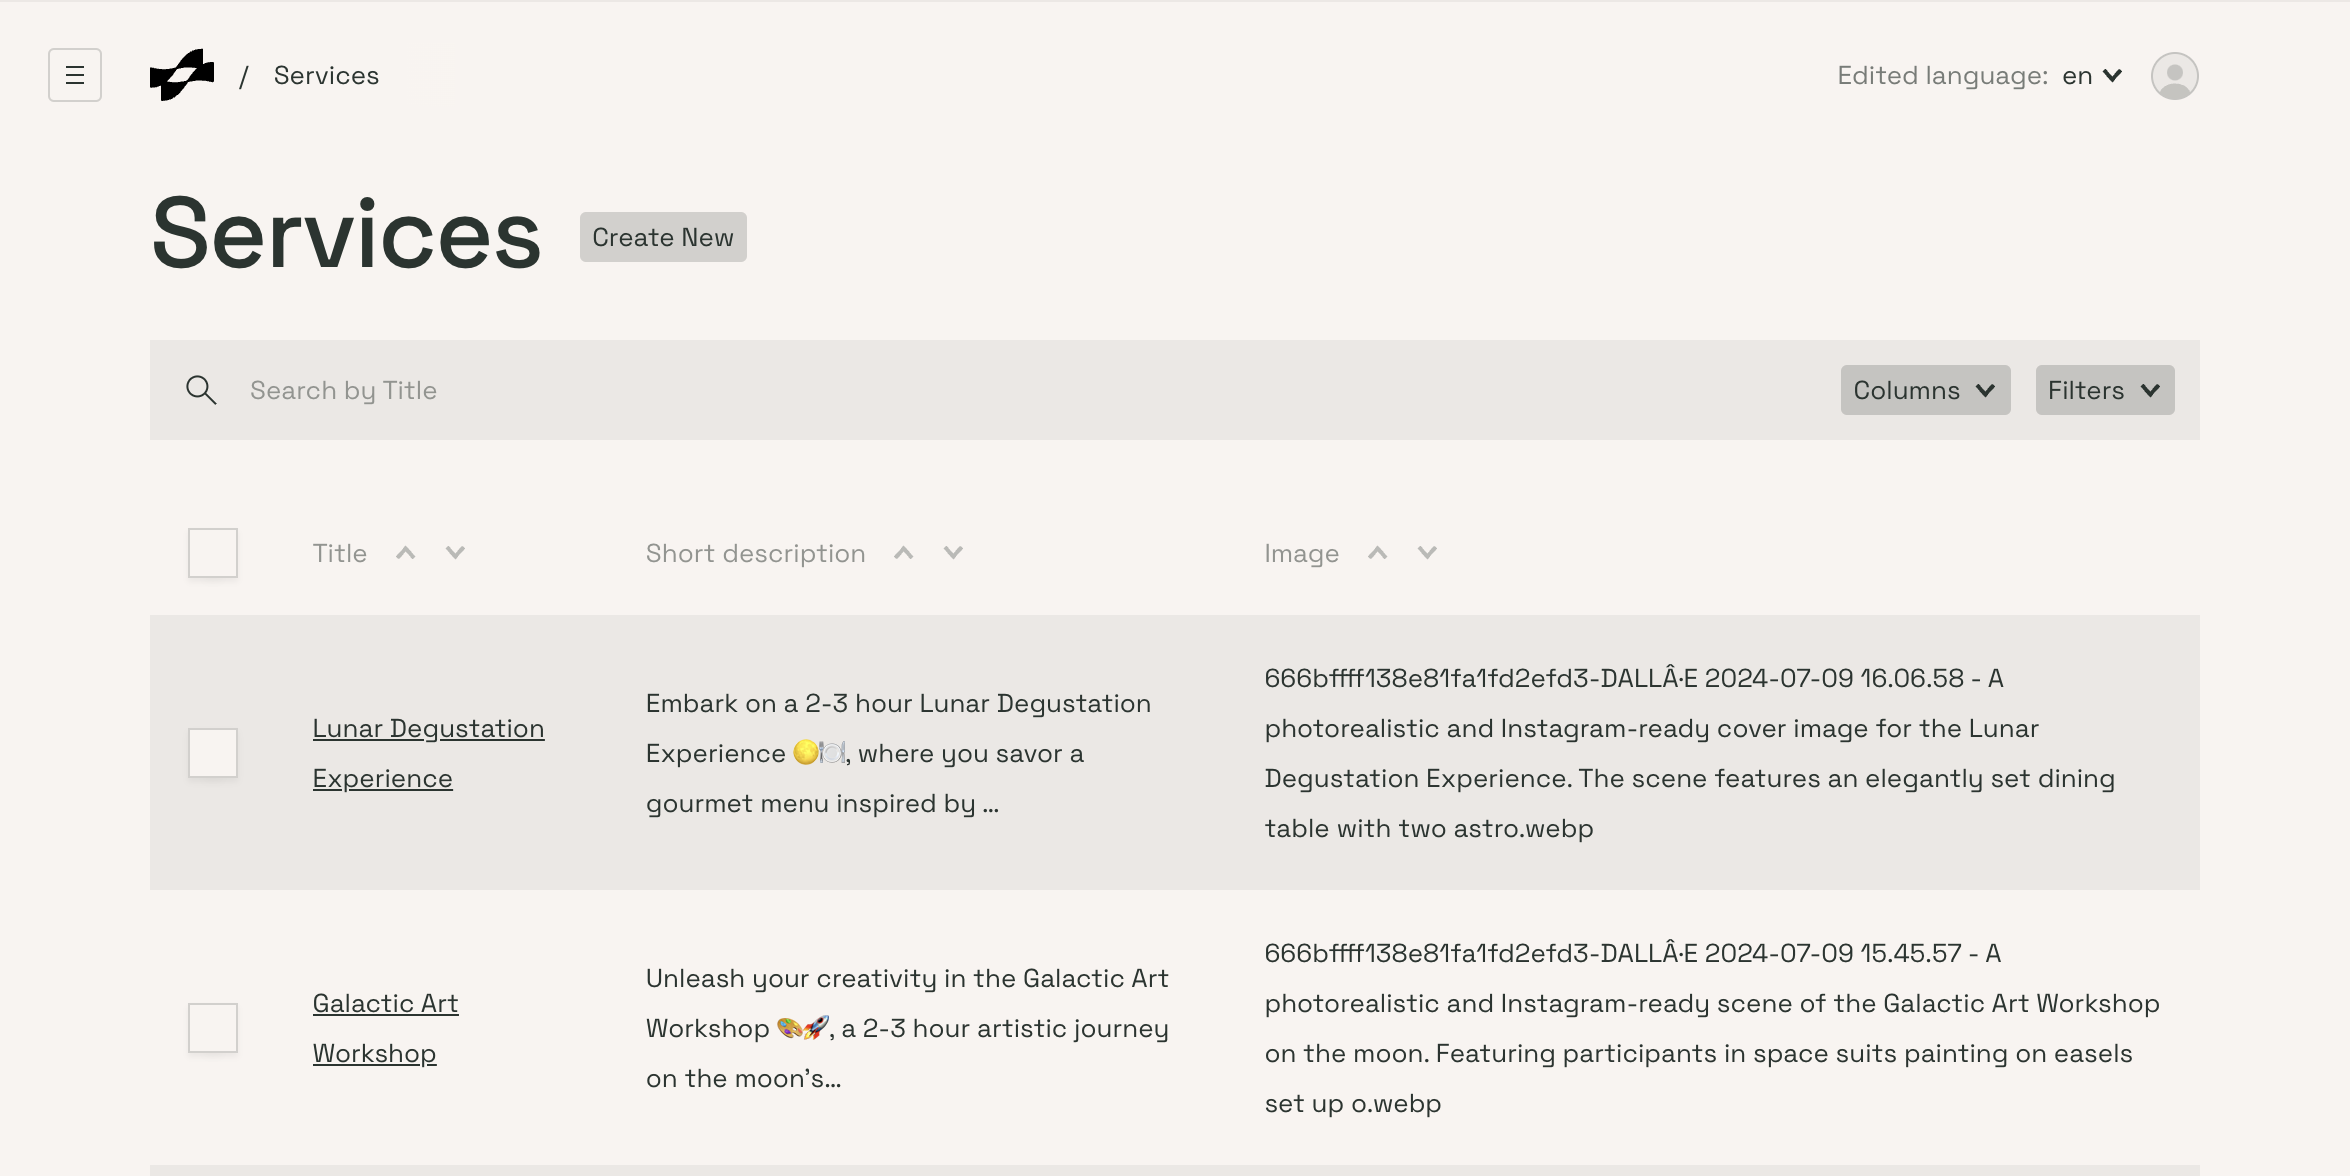
Navigate to the Services Section Click on the "Services" tab under the Operations section in the dashboard.
-
Create New Service Click on the "Create New" button.
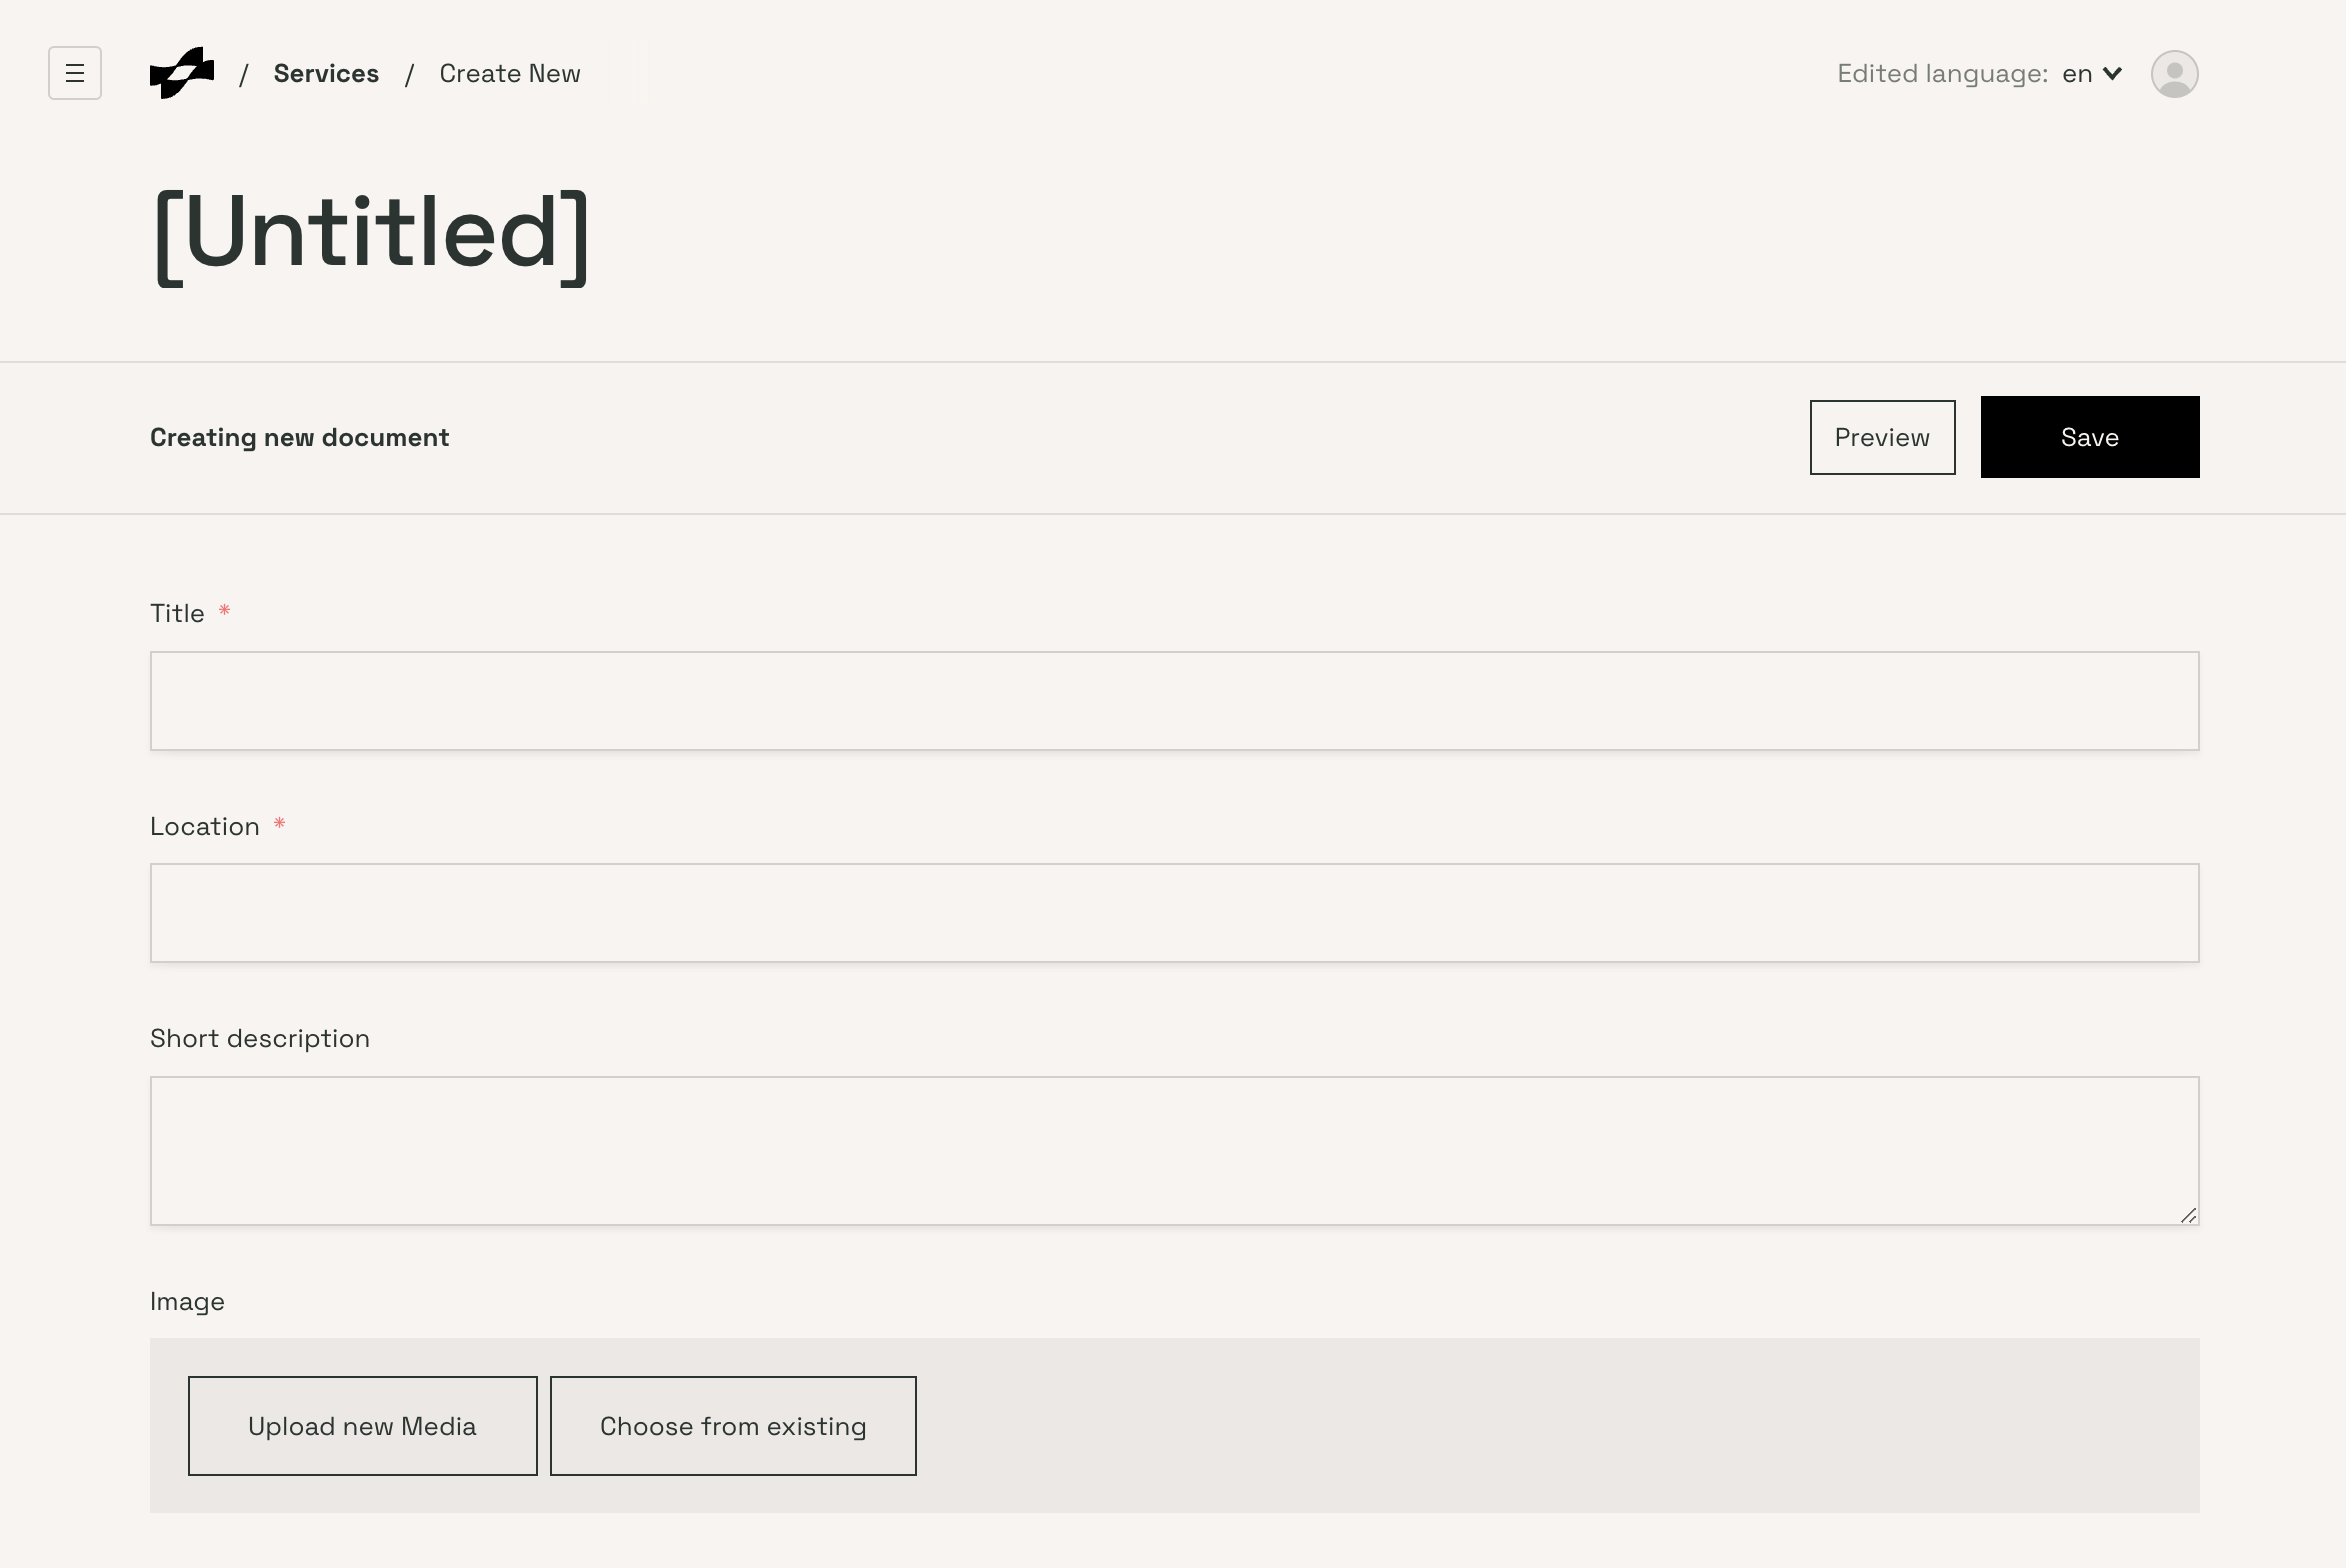
Fill in the new service's details
-
Title: Enter the name of the service. This will be displayed when booking.
-
Location: Specify where the service will take place. You can change this on a per-event basis, but what you enter here will be the default.
-
Short Description: Provide a brief description of the service.
-
Image: Upload an image representing the service by clicking "Upload new Media" or selecting an existing image.
- Select a file: Click on "Select a file" or drag and drop a file into the designated area.
- Alt Description: Enter an alt description for the image. This description should be brief yet descriptive to help with accessibility and SEO. For example, "Guided moonlit beach walk" or "Kayaking tour in clear waters".
-
Long Description: Write a detailed description of the service, including any important information customers need to know. This will appear when customers click the 'More info' button on the service selection screen. Here are some tips and an exciting example for a moonwalk tour:
- Tips:
- Highlight unique aspects of the service.
- Use engaging language to attract customers.
- Include any special instructions or requirements.
- Mention the benefits or experiences customers will have.
- Keep it clear and concise.
- Example: “🌕 Embark on the ultimate lunar adventure with our guided moonwalk tour! Experience the surreal beauty of the moon's surface, where you'll traverse craters and valleys under the gentle glow of Earthlight. 🌌 Feel the exhilaration of low gravity as you bounce along the rugged terrain, just like the astronauts of Apollo missions. 🛰️ Learn fascinating facts about lunar geology and the history of space exploration from our expert guide. 🌠 Capture breathtaking photos of the celestial landscape and create memories that are truly out of this world!”
- Tips:
-
Maximum days to book ahead: Specify how many days in advance customers can book the service. If you want, you can restrict how many days in the future people can book this service. If you don't specify this, the default is a year.
-
Maximum tickets for sale per event: Set the maximum number of tickets available for each event. There's no minimum number of tickets. An event is created even if there's only one ticket sold. If you have a minimum for the type of service you provide, you can reschedule events with few participants, so they coincide with another one, effectively combining them.

-
Add ticket types:
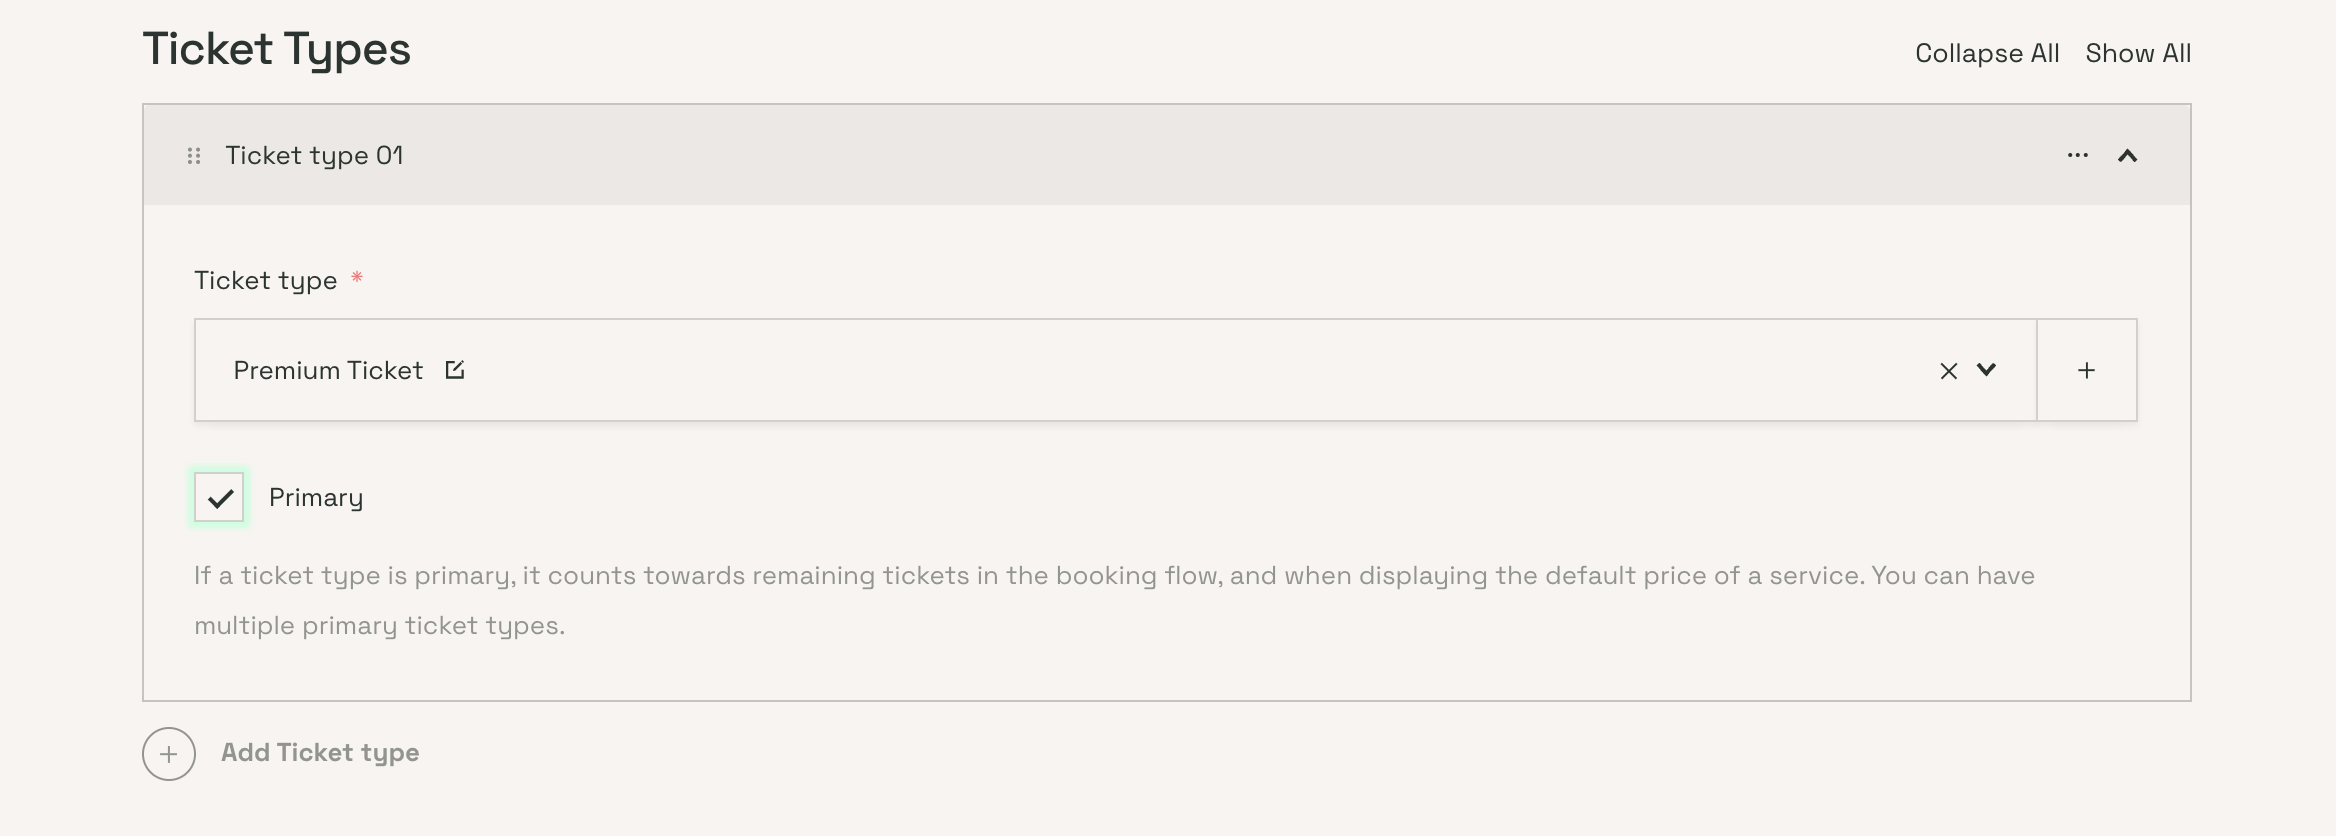
- Click "Add ticket type": You can either select a previously used ticket type from the drop-down list or add a new ticket type by clicking on the "+" button.
- Add new ticket: If adding a new ticket type, follow these steps to fill in the relevant details such as name, display name, and price.
- Primary ticket type: If a ticket type is marked as primary, it will be displayed as the price of the event in the booking flow. If there are multiple primary tickets, the lowest primary ticket price is displayed. If there aren't any primary tickets, the lowest ticket price is displayed.
- Manage ticket types: You can duplicate or delete ticket types as needed. Click on the three-dot menu next to the ticket type and select "Add Below," "Duplicate," or "Remove."
-
Add extras:
- Click "Add extra": You can either select a previously used extra from the drop-down list or add a new extra by clicking on the "+" button.
- Add new extra: If adding a new extra, follow these steps to fill in the relevant details such as name, display name, short description, price, and image.
- Manage extras: You can duplicate or delete extras as needed. Click on the three-dot menu next to the extra and select "Add Below," "Duplicate," or "Remove."
-
Add Timeslots: A timeslot represents a specific duration during which your service can be booked. For example, if you offer a 2-hour guided kayak tour, you might create timeslots from 9:00 AM to 11:00 AM, 1:00 PM to 3:00 PM, and 4:00 PM to 6:00 PM. Each timeslot indicates a window of time when the service is available, allowing customers to choose the most convenient option for them.
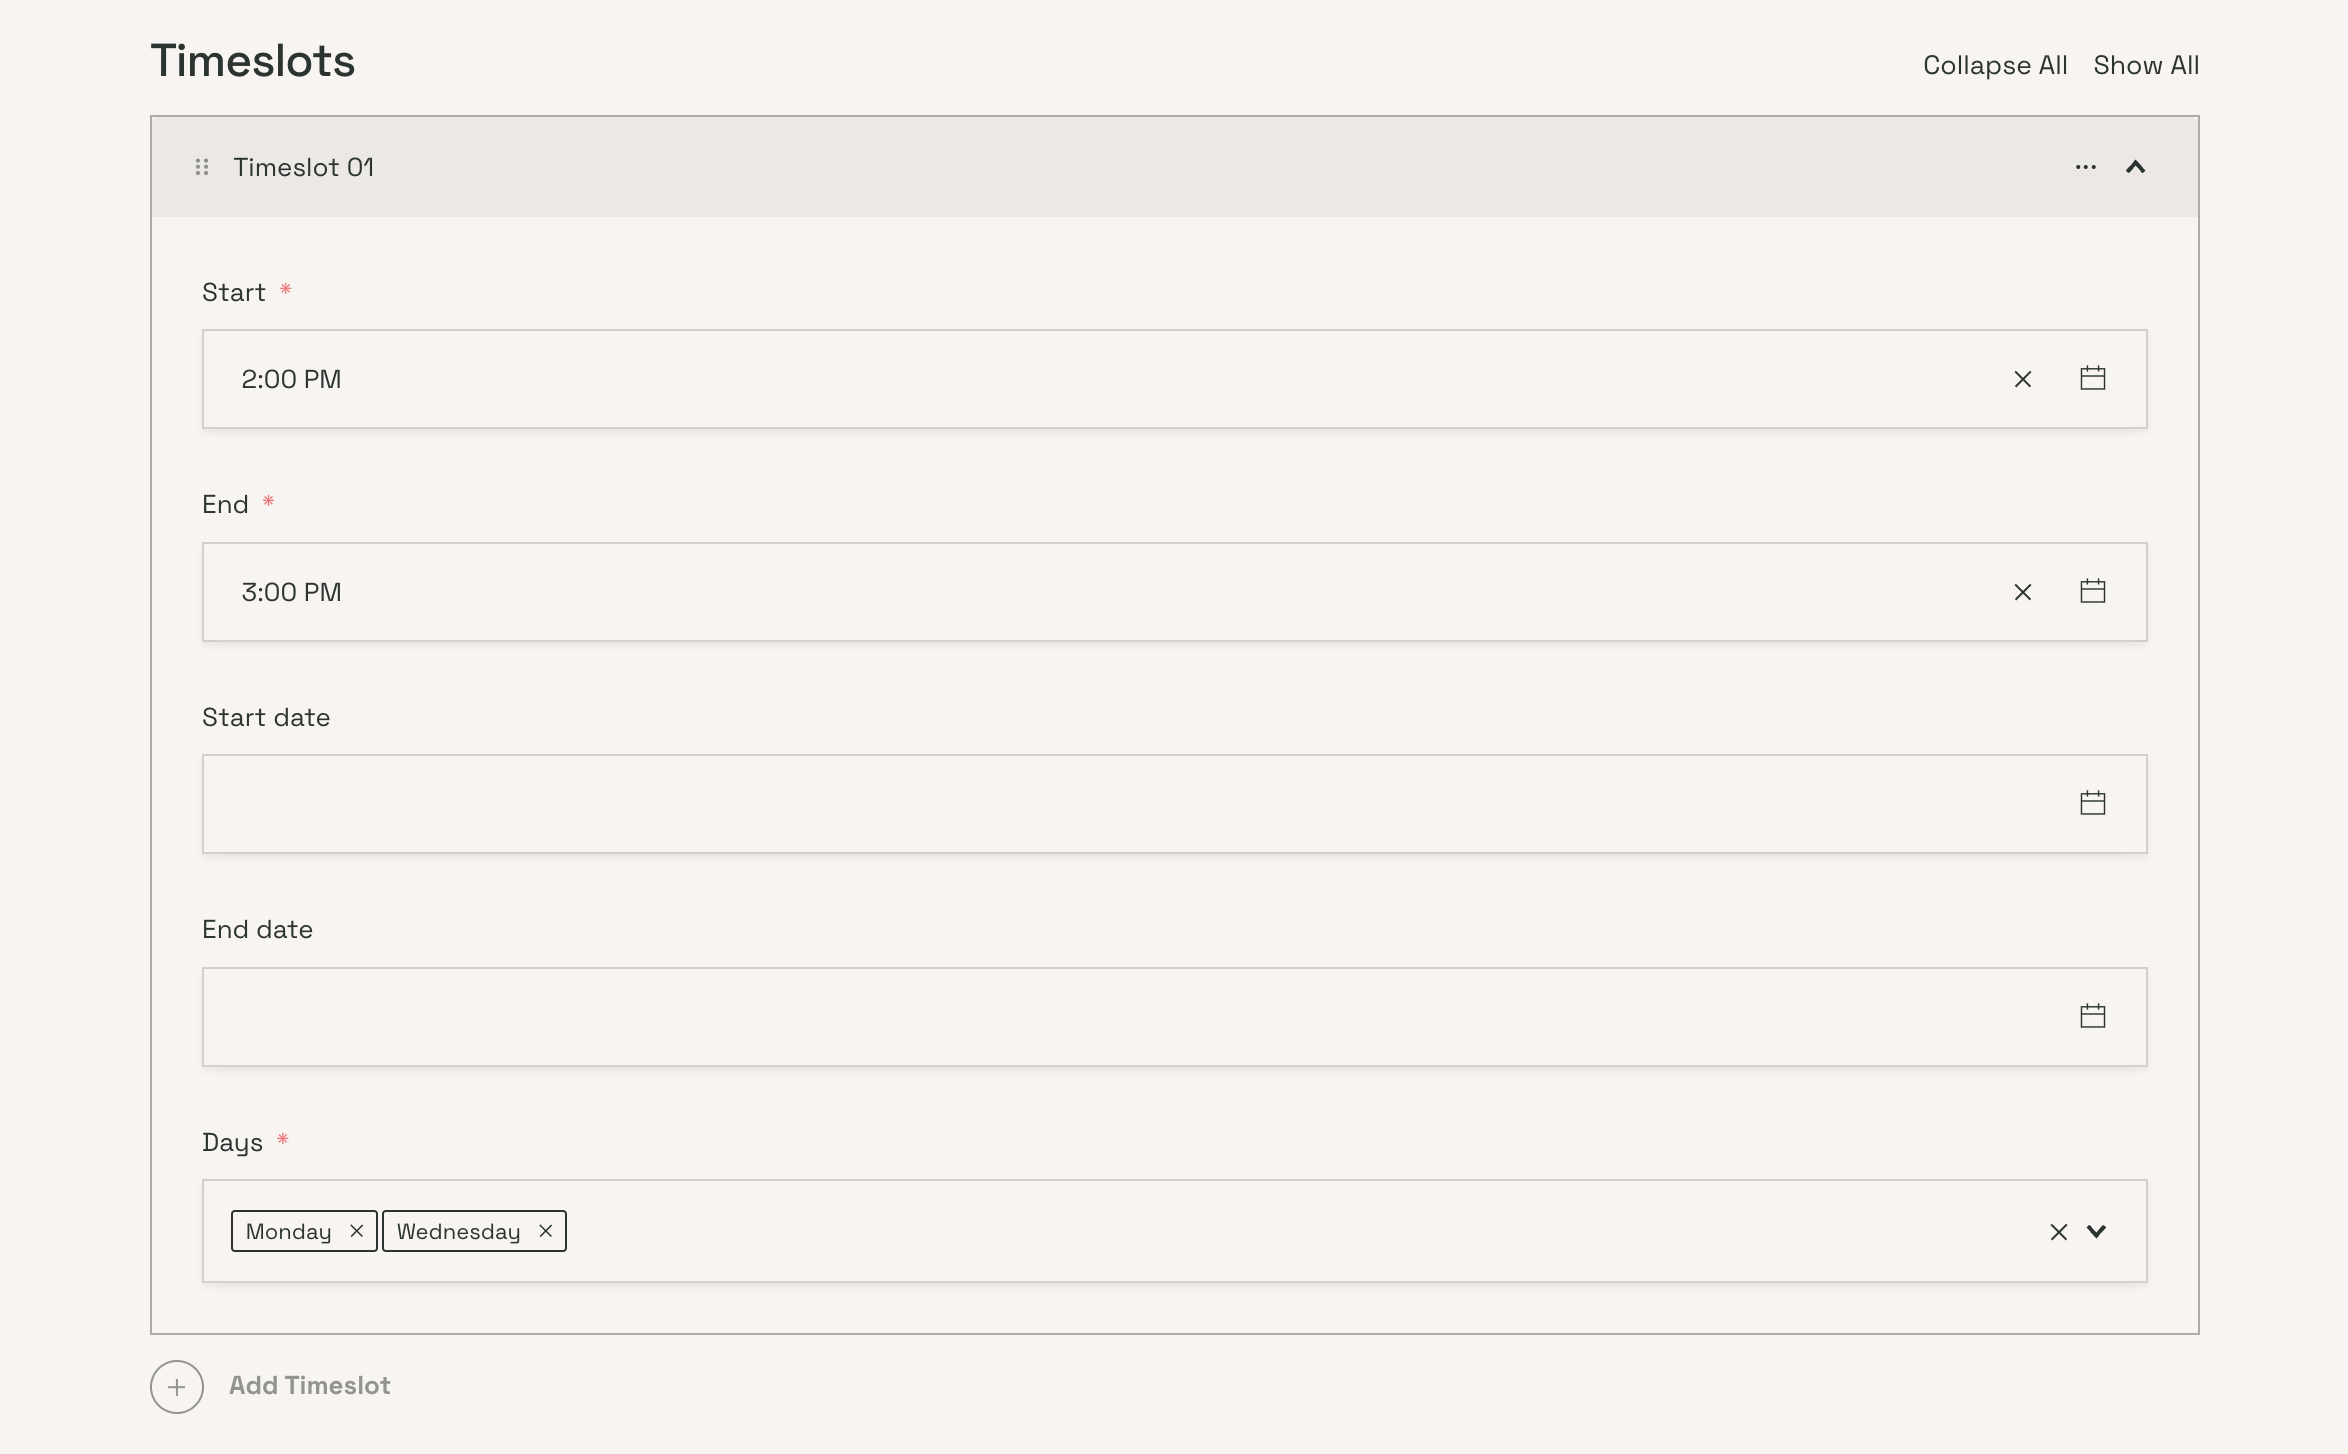
- Click "Add Timeslot": To add a new timeslot for your service, click on the "Add Timeslot" button.
- Fill in the relevant details:
- Start: Enter the start time for the timeslot.
- End: Enter the end time for the timeslot.
- Start Date: Specify the start date for the availability of this timeslot. This is optional – if not specified, the timeslot will be available from today.
- End Date: Specify the end date for the availability of this timeslot. This is optional – if not specified, the timeslot will be repeating indefinitely.
- Days: Select the days of the week when this timeslot is available.
- Manage timeslots: You can duplicate or delete timeslots as needed. Click on the three-dot menu next to the timeslot and select "Add Below," "Duplicate," or "Remove."
-
Voucher purchases:
- Enable or Disable Voucher Purchases: Decide whether you want to sell vouchers (dateless tickets) for this service. A voucher allows customers to book for a specific event at a later date for free.
- Voucher purchase settings: To enable voucher purchases, check the box labeled "Voucher purchases enabled."
-
Final step: save or publish the service:
- Review all details: Ensure all necessary fields such as Title, Location, Short Description, Long Description, Ticket Types, Extras, Timeslots, and Voucher Purchases are correctly filled in.
- Save: Once you are ready to make the service available to customers, click on the "Save" button. This button is located at the top-right corner of the screen.
Editing existing services
-
Navigate to the services section: Click on the "Services" tab under the Operations section in the dashboard.
-
Select a service to edit: In the Services list, find the service you want to edit and click on its title.
-
Edit service details: You will be taken to the service's detail page where you can modify any of the existing details, such as Title, Location, Short Description, Long Description, Ticket Types, Extras, Timeslots, and Voucher Purchases. Follow the same steps as adding a new service to update these fields.
-
Save or publish changes: If you are not ready to update the service for customers, you can save your progress by clicking the "Save Draft" button. This button is located at the top-right corner of the screen. If you are ready to apply the changes, click the "Publish Changes" button. Be aware that publishing changes will immediately affect all future events and bookings for this service. For example, if you update the price, the new price will be reflected in the booking flow from the time of publication.
Managing services
-
Duplicate or delete services: To manage your services efficiently, you can duplicate or delete services as needed. This can help in quickly setting up similar services or removing outdated ones.
-
Access the manage options: In the Services list, click on the three-dot menu next to the service you want to manage. Here, you can select "Add Below," "Duplicate," or "Remove."
-
Duplicate a service: Click on "Duplicate" to create a copy of the service. This is useful for setting up similar services without starting from scratch. After duplicating, you can edit the new service as needed.
-
Delete a service: Click on "Remove" to delete the service. Confirm the deletion when prompted. Be cautious with this action, as it cannot be undone.